View or change the properties for an Office file
Excel for Microsoft 365 Word for Microsoft 365 PowerPoint for Microsoft 365 Access for Microsoft 365 Project Online Desktop Client Publisher for Microsoft 365 Visio Plan 2 Excel 2021 Word 2021 PowerPoint 2021 Access 2021 Project Professional 2021 Project Standard 2021 Publisher 2021 Visio Professional 2021 Visio Standard 2021 Excel 2019 Word 2019 PowerPoint 2019 Access 2019 Project Professional 2019 Project Standard 2019 Publisher 2019 Visio Professional 2019 Visio Standard 2019 Excel 2016 Word 2016 PowerPoint 2016 Access 2016 Project Professional 2016 Project Standard 2016 Publisher 2016 Visio Professional 2016 Visio Standard 2016 InfoPath 2013 More. Less
Document properties, also known as metadata, are details about a file that describe or identify it. They include details such as title, author name, subject, and keywords that identify the document's topic or contents.
If you include the document properties for your files, you can easily organize and identify them later. You can also search for documents based on their properties or insert them into your documents.
Learn more about document properties
There are four types of document properties:
- Standard properties - By default, Microsoft 365 documents are associated with a set of standard properties, such as author, title, and subject. You can specify your own text values for these properties to make it easier to organize and identify your documents. For example, in Word, you can use the Keywords property (also called Tags) to add the keyword "customers" to your sales documents. You can then search for all sales documents with that keyword.
- Automatically updated properties - These properties include both file system properties (for example, file size or the dates when a file was created or last changed) and statistics that are maintained for you by Microsoft 365 programs (for example, the number of words or characters in a document). You cannot specify or change the automatically updated properties. You can use the automatically updated properties to identify or find files. For example, you can search for all files created after August 3, 2015, or for all files that were last changed yesterday.
- Custom properties - You can define additional custom properties for your Microsoft 365 documents. You can assign a text, time, or numeric value to custom properties, and you can also assign them the values yes or no. You can choose from a list of suggested names or define your own. For more information see View or create custom properties for a file
- Document library properties - These are properties that are associated with documents in a document library on a website or in a public folder. When you create a new document library, you can define one or more document library properties and set rules on their values. When you add documents to the document library, you are prompted to include the values for any properties that are required, or to update any properties that are incorrect. For example, a document library that collects product ideas can prompt the person for properties such as Submitted By, Date, Category, and Description. When you open a document from a document library in Word, Excel, or PowerPoint, you can edit and update these document library properties by clicking File >Info. All required properties from the document library are outlined with red borders on the Info tab in Word, Excel, and PowerPoint,.
If you want to insert any of these properties into your Word document see Add the file name, date, author, or other document properties to a header or footer.
View and change the standard properties for the current file
Which Office program are you using?
- Click the File tab.
- Click Info.
- Click the View and edit database properties link at the top of the page.
- In the Properties dialog box, click the tabs to select the properties that you want to view or update.
- Click OK. Any changes you made are saved automatically.
- Click the File tab again to return to your database.

- Click the File tab.
- Click Info to view the workbook properties.
- To add or change properties, hover your pointer over the property you want to update and enter the information.
- Click the File tab again to return to your workbook. Any changes you made are saved automatically. Optional steps:
- To see more properties, click the Show All Properties link at the bottom of the page.
- To open a properties dialog box where you can add or edit all the properties at once and view document information and statistics, click Properties at the top of the page, and then click Advanced Properties.
- Click the File tab.
- Click Info to view the presentation properties.
- To add or change properties, hover your pointer over the property you want to update and enter the information.
- Click the File tab again to return to your presentation. Any changes you made are saved automatically. Optional steps:
- To see more properties, click the Show All Properties link at the bottom of the page.
- To open a properties dialog box where you can add or edit all the properties at once and view document information and statistics, click Properties at the top of the page, and then click Advanced Properties.
- Click the File tab.
- Click Info to view the project properties.
- To add or change properties, hover your pointer over the property you want to update and enter the information.
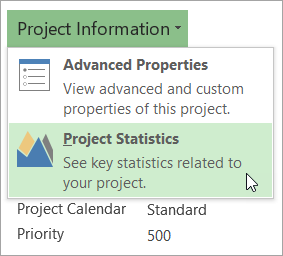
- Click the File tab again to return to your project. Any changes you made are saved automatically. Optional steps: To see more properties or statistics, click Project Information at the top of the page, and then click Advanced Properties or Project Statistics.
- Click the File tab.
- Click Info to view the properties.
- Click the File tab again to return to your publication. Any changes you made are saved automatically.
Optional steps:
To open a properties dialog box where you can add or edit all the properties at once and view document information and statistics, click Publication Properties at the top of the page, and then click Advanced Properties.
On the Summary tab, you can add or edit the Title, Subject, Author, Manager, Company, Category, Keywords (also called Tags), and Comments.
- Click the File tab.
- Click Info to view the properties.
- To add or change properties, hover your pointer over the property you want to update and enter the information.
- Click the File tab again to return to your publication. Any changes you made are saved automatically. Optional steps:
- To open a properties dialog box where you can add or edit all the properties at once and view document information, click Properties at the top of the page, and then click Advanced Properties.
- Click the File tab.
- Click Info to view the document properties.
- To add or change properties, hover your pointer over the property you want to update and enter the information. Note that for some metadata, such as Author, you'll have to right-click on the property and choose Remove or Edit.
- Click the File tab again to return to your document. Any changes you made are saved automatically. Optional steps:
- To see more properties, click the Show All Properties link at the bottom of the page.
- To open a properties dialog box where you can add or edit all the properties at once and view document information and statistics, click Properties at the top of the page, and then click Advanced Properties.
View or create custom properties for the current file
Custom properties are properties that you define for an Microsoft 365 document. You can assign a text, time, or numeric value to custom properties, and you can also assign them the values yes or no. You can choose from a list of suggested names or define your own.
- Click the File tab.
- Click Info.
- Click Properties at the top of the page, and then select Advanced Properties.
- In Access you'd select View and edit database properties
- In Project you'd select Project Information
- In Publisher you'd select Publication Properties
- Currently, you can't view or create custom properties for Visio files
- In the Name box, type a name for the custom property, or select a name from the list.
- In the Type list, select the data type for the property that you want to add.
- In the Value box, type a value for the property. The value that you type must match the selection in the Type list. For example, if you select Number in the Type list, you must type a number in the Value box. Values that don't match the property type are stored as text.
